
“The creation of something new is not accomplished by the intellect but by the play instinct.” ~Carl Jung
If you give a child a sandbox, he will play in it.
If you give a child a sandbox equipped with ALL kinds of materials for play possibilities, he will create worlds the likes of which we’ve never even imagined. Except maybe, when we were children ourselves.
With creative materials and various “loose parts” at his fingertips, the potential to turn a child’s simple play session into an extended, imagination-filled play experience grows exponentially. He will become an architect, a builder of new worlds. She will become a scientist, experimenting with cause and effect and gravity, making predictions and testing hypothesis. He will be an accomplished chef, serving his imaginary patrons only the best recipes…all of his own creation.
And also? Your child will be busy and happy longer.
Children will play. It’s what they do. It’s our job as teachers, parents, caregivers, and grandparents to create an environment conducive to play. Now, I’m not talking about buying all the toys. I am well aware that children play best with a cardboard box and a couple of sticks. What I’m talking about is providing simple materials to enrich their play spaces; making spaces child-friendly, where messes can be made, ideas can be tried, and children can do their best work.
Adults work so much better with their offices and workspaces built to encourage efficiency and comfort. Why should a child’s work space be any different? Play is a child’s work. So let’s give them the space they need to succeed in the work place!
Quite often, we focus only on the indoor workspace. But even without reading studies and statistics, I can tell you from experience, that children thrive in the outdoors. The kids I work with on a daily basis NEED to be outside at LEAST once a day or tempers flare, they get antsy, or they simply get bored.
This Spring, I’ve been working on making our outdoor play/work space something really special. We started with our Clubhouse, and now we are sharing our new and improved sand play area.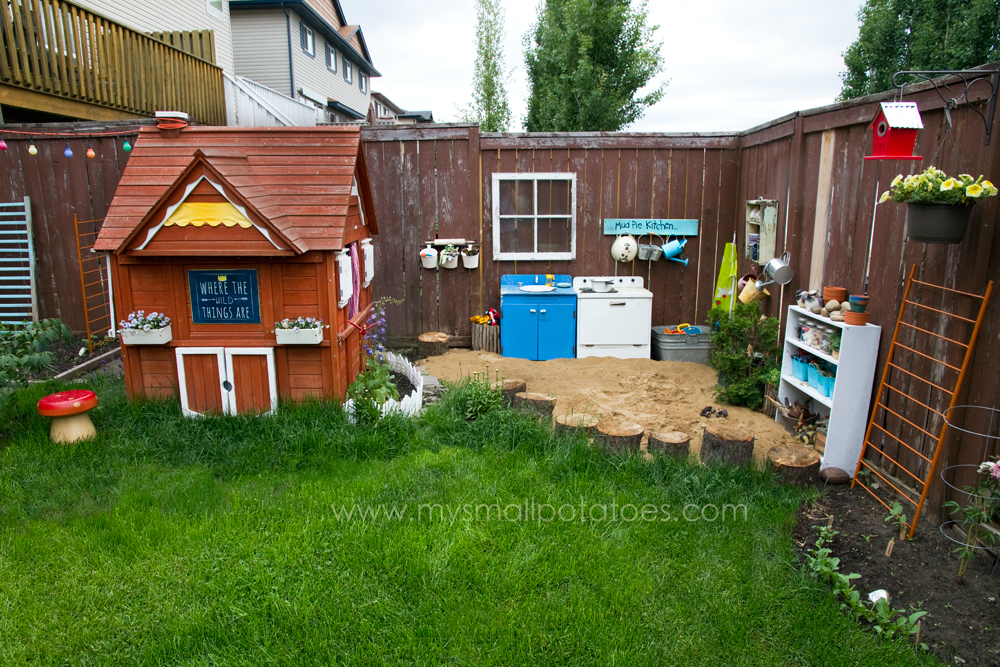
The Mud Pie Kitchen tucked in the back there, will be a different post altogether. Today we will go over the sand play area, starting with the overall design.
I used stumps to divide the sand from the grass for a few reasons. First, it looks fantastic! Secondly, it was cost-effective, having had the stumps donated by one of our dayhome families. But most importantly, the stumps create a terrain that begs for children to come and play.
Stumps serve SO many purposes when it comes to a child’s work space. Stumps make great little tables. Stumps create walls and shade for little creatures that might be part of the day’s play session. Stumps are great for walking on, balancing, and hopping from one to the next. Stumps are helicopter landing pads, tall mountains, diving boards, and skating rinks. Stumps are all the things.
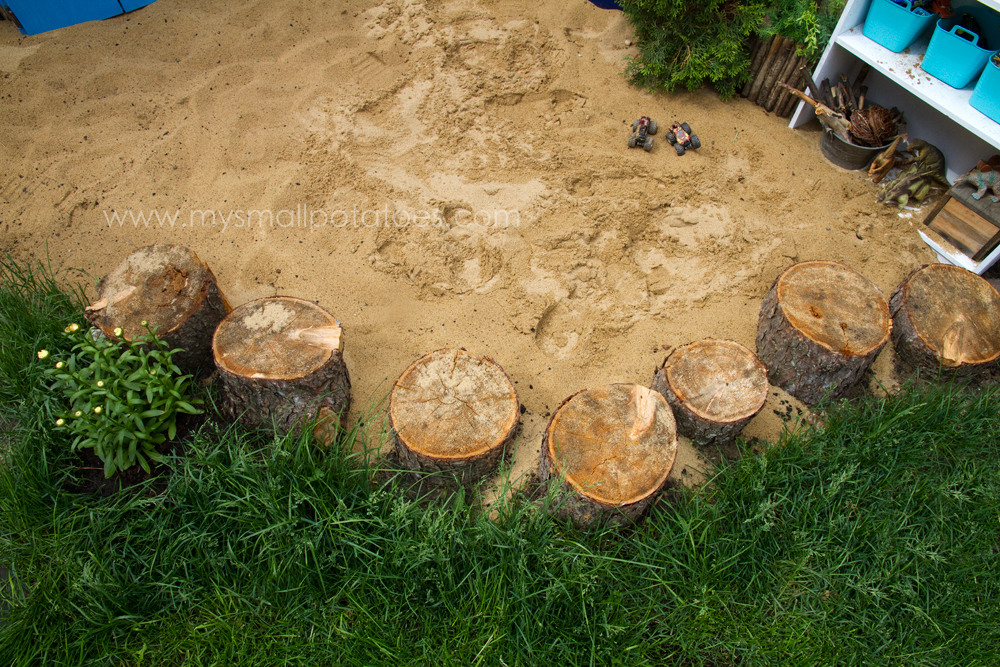
I simply dug holes in the ground, inserted the stumps, stomped and jumped up and down on each one until they all stood sturdy and firm, then packed the dirt back in and around them. I placed them at various heights to create more of a challenge when walking from one to the next.
I used 13 bags of play sand from Home Depot to fill this space. I use a tarp and stones to weigh it down if I need to cover it for any reason. We have had NO cats in our yard thus far, so they have not been a problem at all.
I left a space between the stumps to create a pathway to the clubhouse door, thus preventing any kids tripping on their way to and from the clubhouse. You’ll see at the back of this photo I have created a little storage unit for diggers. This is no ordinary storage. It is a log tunnel for bunnies and guinea pigs I purchased at the pet store. I have turned it on its side and placed up against the fence to store the plastic trucks. When it’s not holding the diggers, it can be used as a tunnel for cars, trucks, and diggers, or caves for dinosaurs, bears, etc. I believe in getting the most bang for my buck, so I always try to think of more than one purpose for things I add to our play space.

I also keep the grass tall around the stumps, it provides a wilder, more natural terrain, and creates great cover and hiding places for little toys and parts used in free play.
Our sand play materials can be found on our “loose parts” shelf right next to the sand. A child’s play materials should be convenient, visible, and easily accessible. No artist will want to traipse across the studio each time he needs a pencil or a particular paintbrush, it interrupts the flow of creativity and productivity. I purchased the shelf at a thrift store for $5 and painted it with an exterior paint from the mis-tinted paints section of the local hardware store.
All of the materials on our loose parts shelf with the exception of the terra-cotta pots and the ornamental birds, were found in our indoor stash of play materials. I simply moved them outside.
The top shelf contains little terra-cotta pots, pot trays, river rocks, and little ornamental garden birds. These birds are a favourite for flying the flower fairies around the back yard. They were purchased at Wal-Mart in the seasonal section for $6/each.
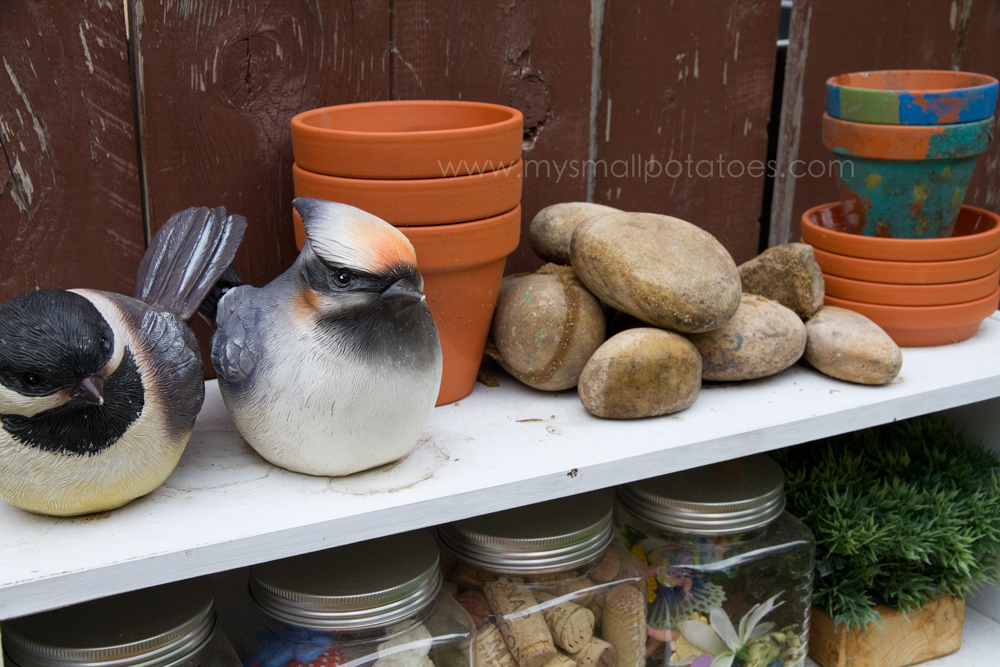
*And if you have terra-cotta pots, you have no need to store funnels in your play space. Children have a way of showing us that “other purpose”for things we put within their reach.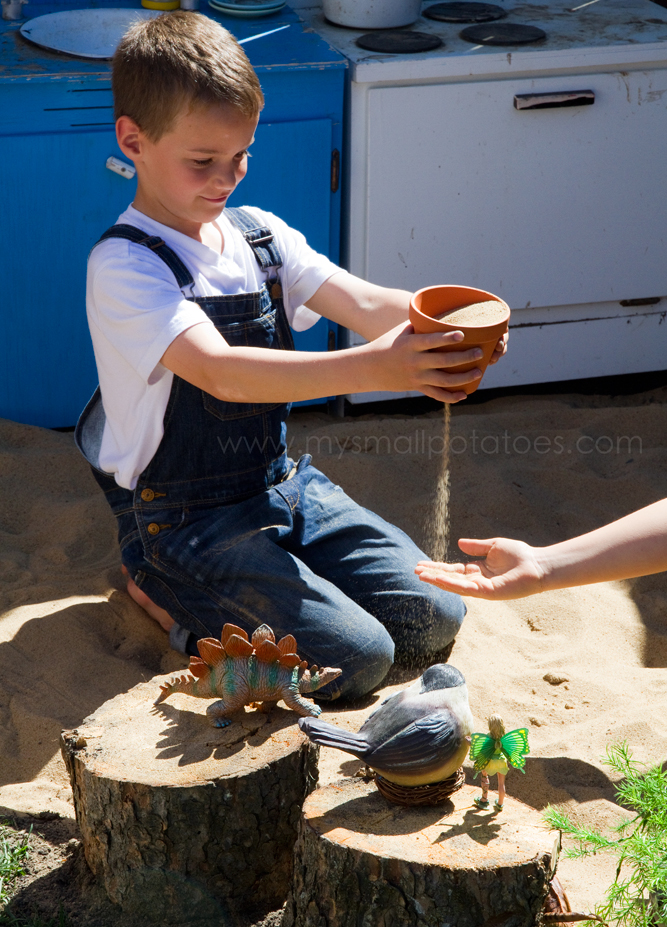
The second shelf contains little plastic jars of loose parts, along with plastic grass bits from the dollar store and a few wood blocks…

The middle shelf contains bins of larger items, too big for jars and too fussy for lids…
At the bottom, we have sticks, bird nests, metal basins, a box of Hotwheels, and the larger dinosaurs…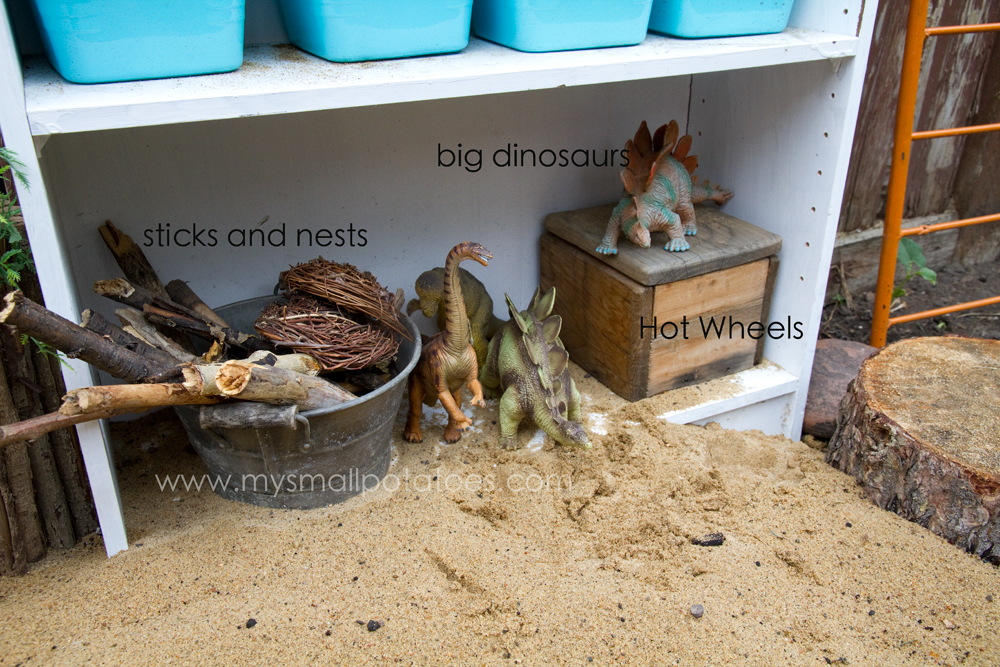
*Next to this shelf is another wooden tunnel I use to store plastic greenery. The children most often use the greenery as trees in their playscapes, but I’ve seen them used as cotton candy, so the sky really is the limit when it comes to play materials!
All in all, this project has been worth every single second of work done and every penny spent. It is a hub of activity whenEVER we are in the back yard…

~Arlee, Small Potatoes


It’s beautiful! What do you do when it rains, or worse, storms?
Thank you! Nothing at all! It has weathered plenty of thunder/hail storms already this season. All is well! If you have big trees in your yard and you’re worried about leaves blowing in, just keep a take close by. 🙂
This is amazing and beautiful! My kids would have south fun there! You are inspiring me to do more with our yard! Thank you!!
I love this idea but we have so many cats I think it would end up full of poo. I bet your children absolutely love it too your amazing Arlee
I LOVE this idea!!!
Awesome!!!!
Love this!! I have a small fenced in area for my kids to play in. My summer project is turning it into a huge sandbox for them to play in. They will play in the sand for hours, and I love to see their imagination at work when they do. This gave me so much inspiration!
OMG Arlee!!! This is FANTASTIC!!!!! Bravo bravo!!!!!!!
Sent from my iPhone
>
I always wanted a sand box for my little one, he loves to play in sandbox, but your idea, really seems smart and so appealing, I am sure my son would go crazy. Thanks for sharing
This is beautiful! This might be a silly question but do you have any problems with neighborhood cats?
This is so magical! If only we had a garden, I’d surely have done this for my Little Man. I’m so happy to see that there are still parents in this world who remember about enhancing the development of their child’s imagination 🙂
Did you put weed cloth down and then put sand on top of it? I too have stray cats but thought I might cover with a tarp and rocks as well. Thanks for the great idea
I did not put a weed cloth down…we did that in our first sandbox and the kids kept digging down in the cloth and tearing bits off. We just pull the stray tiny weeds that come up in this sand play area…it’s not a big deal at all. 🙂
how is your house not filled with tracked in sand?
Love it! It’s beautiful get away for them – thanks for sharing!
Pingback: It’s Not JUST a Sandbox…Turn Your Sand Play Area into Something Special | Lady Molly's Blog
… very nice and great for the kids.
Many greetings
Siegfried
This is great! Well done!
This is incredible creativity! What a fun area!! 🙂
What an amazing space! My daughter absolutely loves sand and buries pretty much anything she can find, then we have to dig to find the hidden treasure!
ES HERMOSO!! EXCELENTE IDEA.
Re-purposing old toys to the sand pit is a great idea! Well done!
so nice!!
I love the way you put this together, and how in tune you are with the things that can satisfy the mind and creativity of your children. Props. This is a just one of many examples that show you were cut out for this job.
Pingback: DIY Sandbox Ideas | DIY Ready
Pingback: DIY Sandbox Ideas - DIY Projects | DIY Craft and Project Tutorials
Love this!