
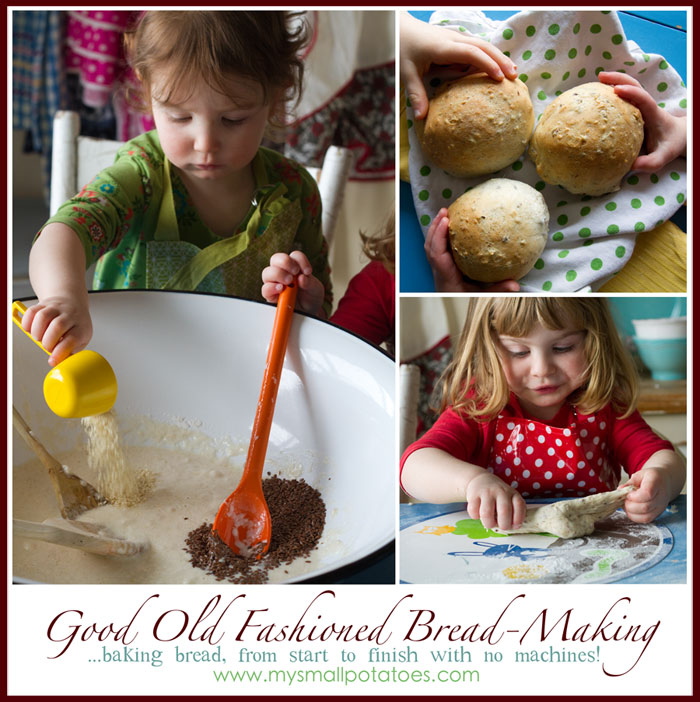
 “Good, old-fashioned ways keep hearts sweet, heads sane, and hands busy.” ~Louisa May Alcott
For as long as I can remember, my mom has made her own bread. It is the first thing I reach for when I go home for a visit…a slice of my mom’s bread, toasted with honey or jam. I have spent the last 20 years trying to perfect my mama’s bread recipe, but it’s still not the same as hers. Sigh.
Last week, the smalls and I set to making a batch of bread for our lunch later on in the day. It was really cold outside. Spring is still taking its sweet time in getting here, and nothing soothes the soul like fresh bread from the oven on a cold day like homemade bread. Usually I would whip up a batch of bread on my own during nap time or while the smalls have their free play time, but on this day, they needed to get involved. They were cranky and restless and just as tired of Winter as I was. I did not use the mixer for this batch, as I figured a little dough pounding would be good medicine for these restless little souls.
I have prepared a picture tutorial for you to follow along if you’d like to make bread at home. The full recipe is posted at the bottom, along with a few tips for getting the best bread possible.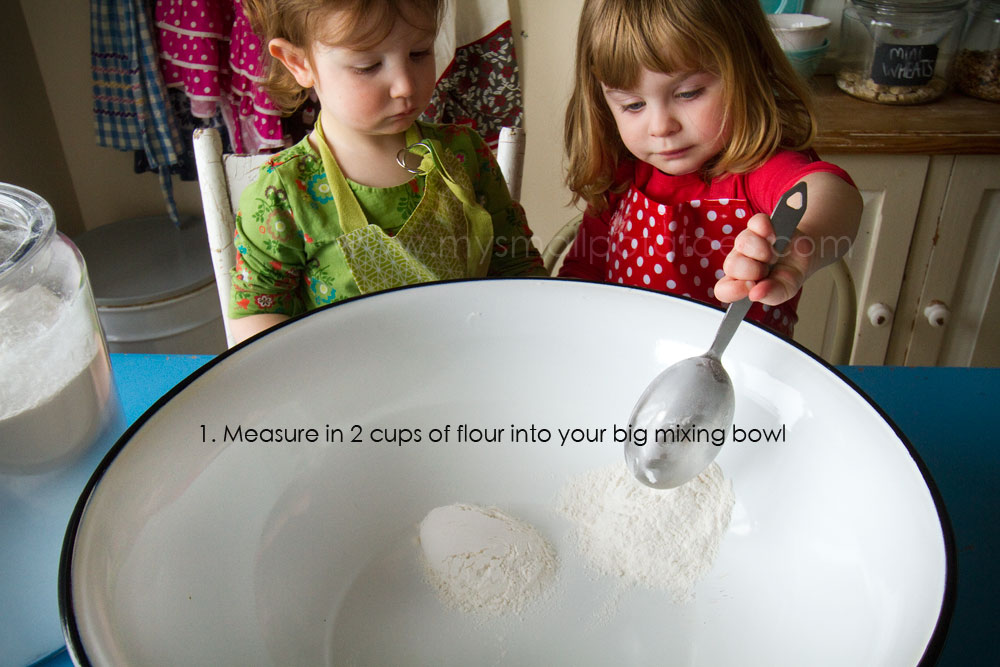
 *This is also where you would add your cooking oil.
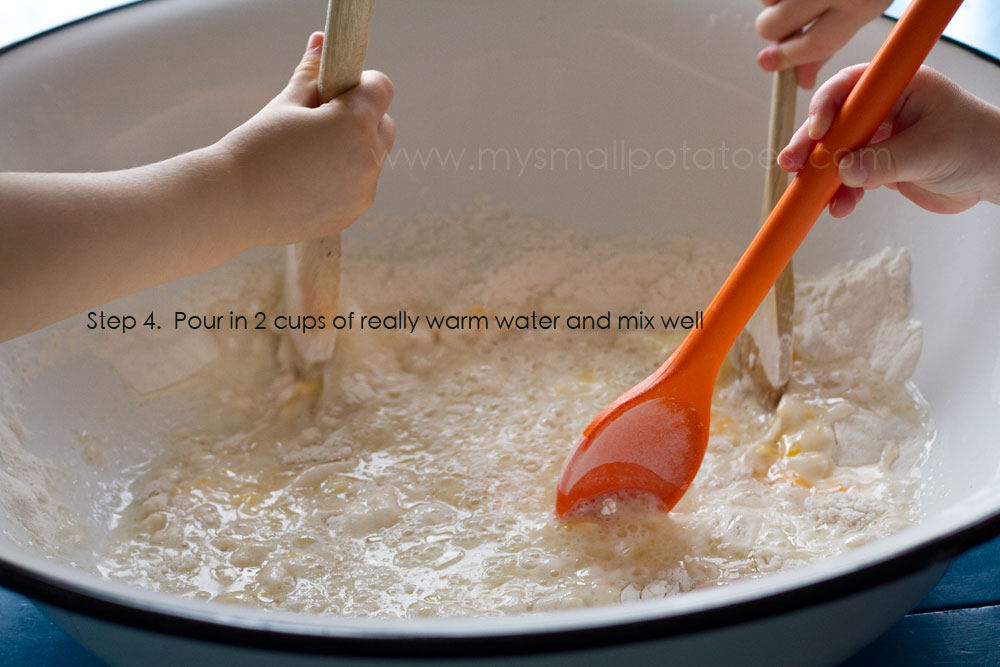
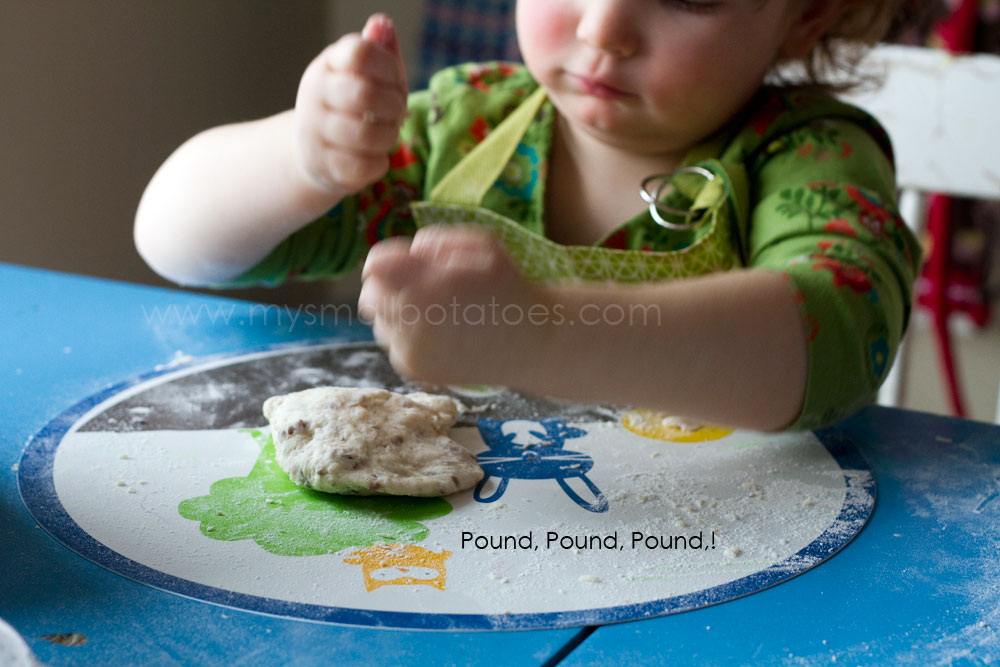
 Now this is where the real fun begins. And the noise. I gave each of the smalls a ball of dough and a wee bit of flour for themselves and we spent the next 10 minutes pounding, squishing, chanting, laughing, banging, and making an all out ruckus!
Let the wild rumpus start!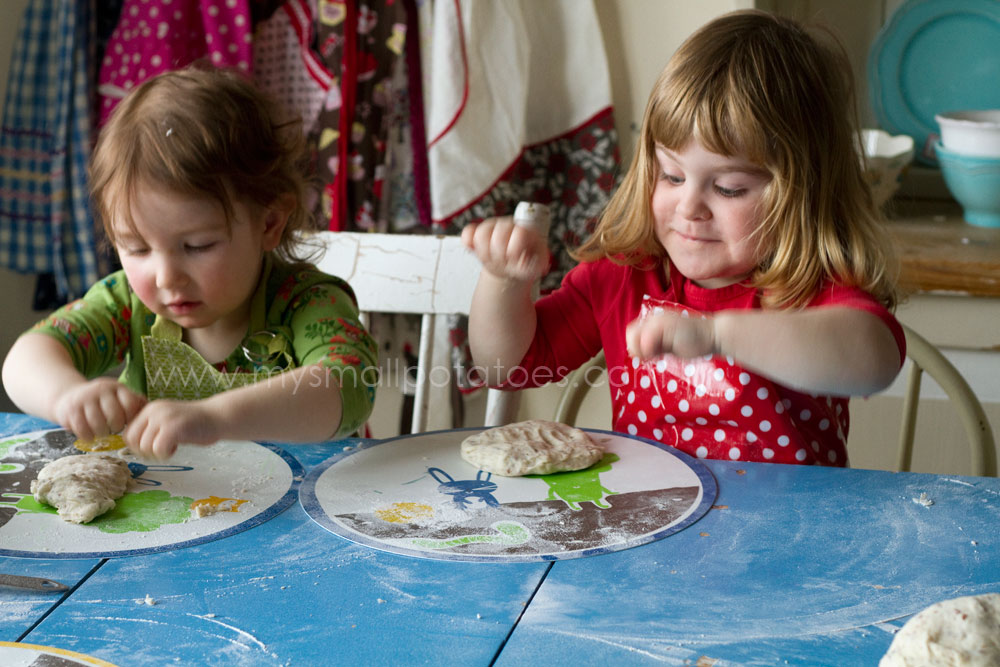
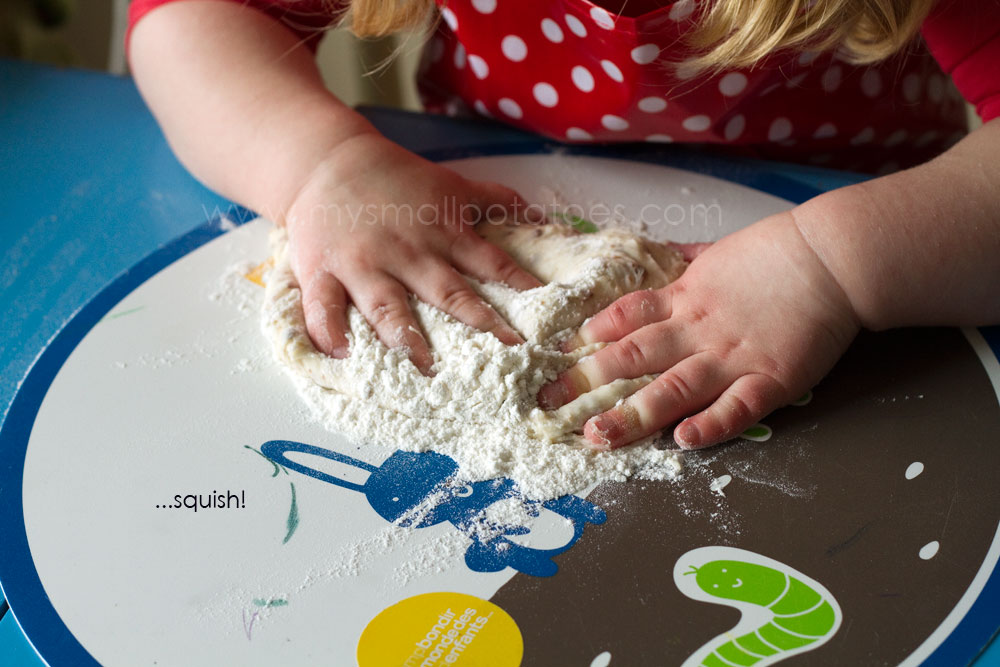
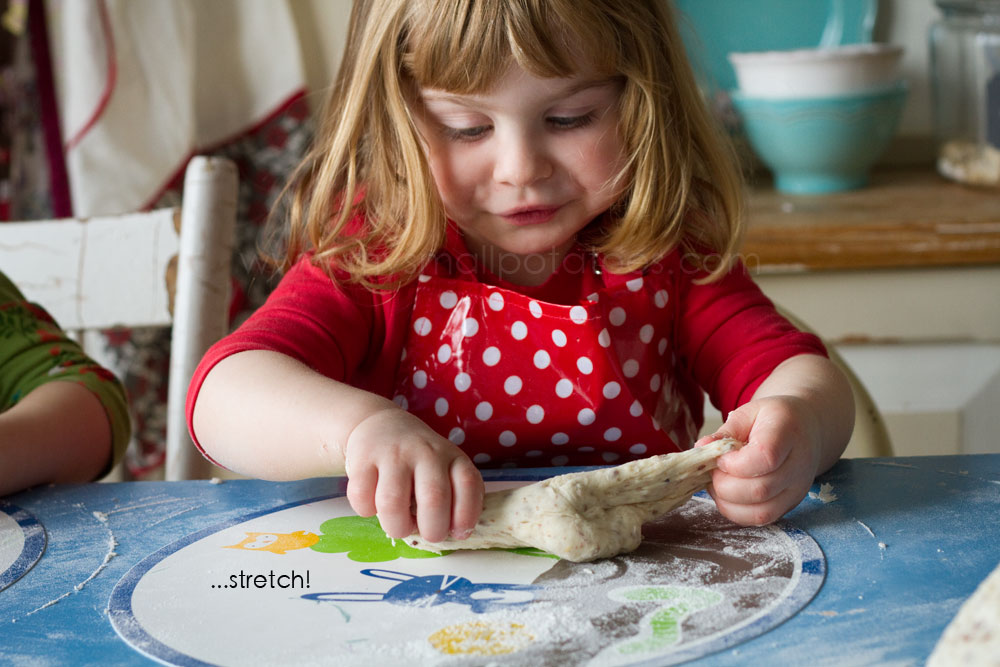
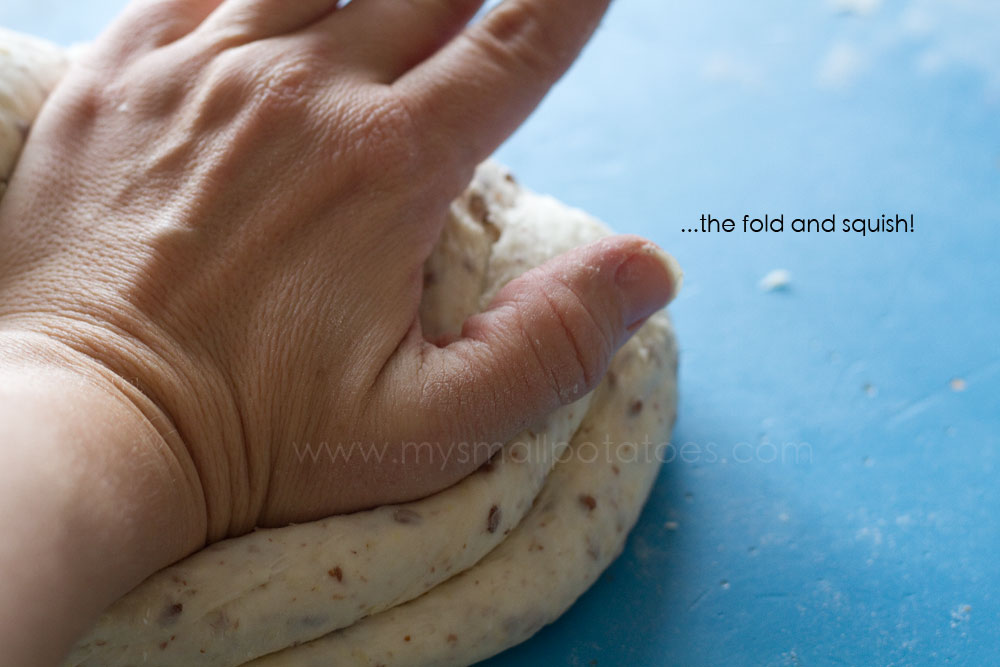 Each small took a turn or two choosing which way to knead their dough, and the rest of us followed along chanting the action while we worked. It was really loud, really obnoxious, and really fun! Oh, and if you’re dough looks like this…
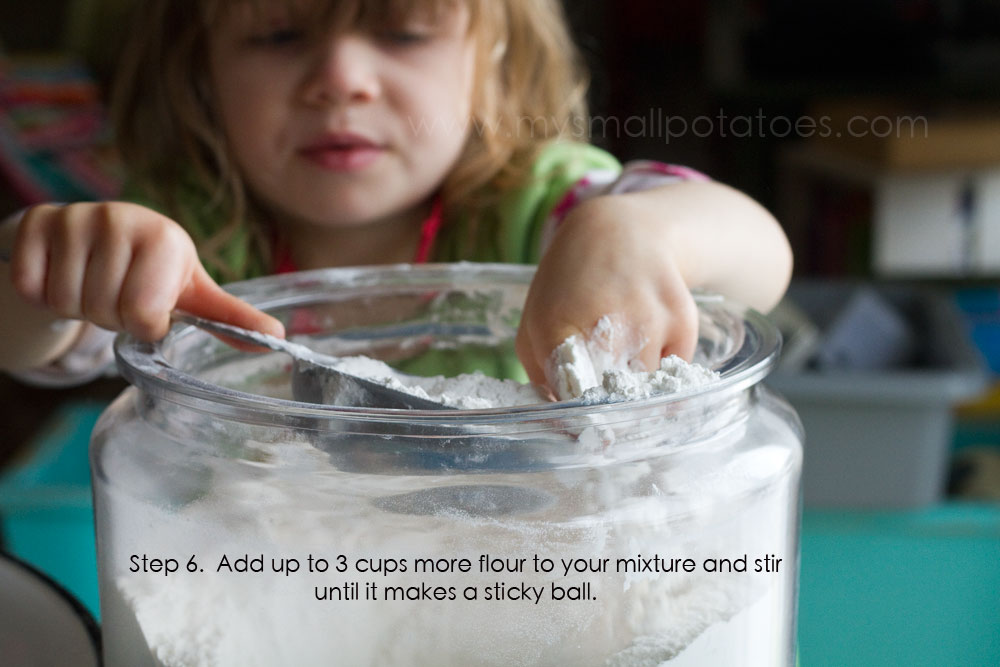
 Just add more flour a bit at a time. You don’t want the dough to be dry, you want it to be “sticky” but not to “stick”. Make sense?
Now it’s time to take a rest and let your dough take over. Place the dough in a big bowl and cover it with a damp cloth…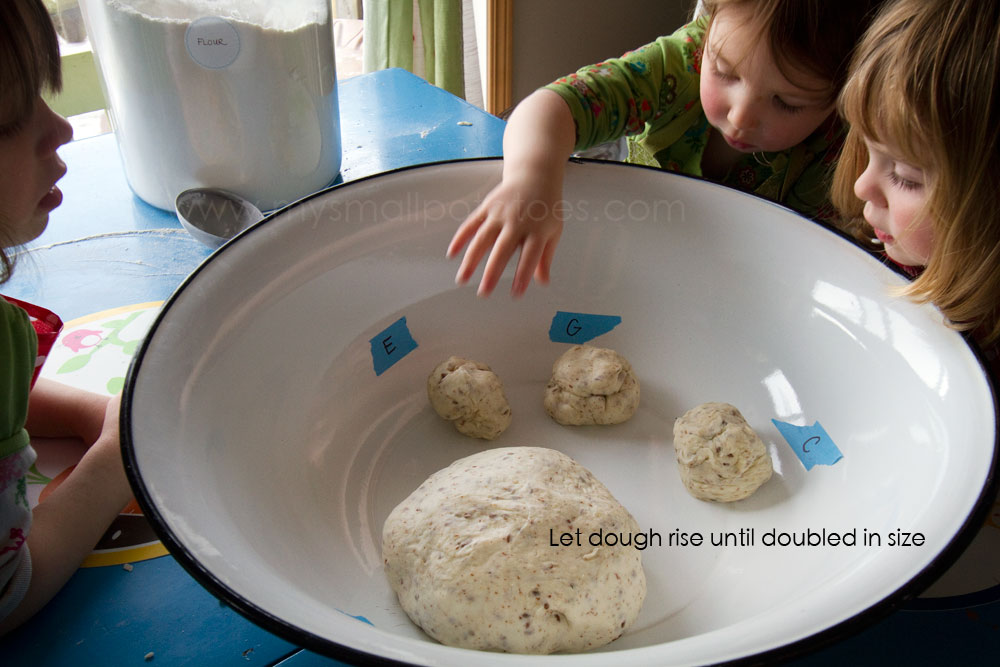
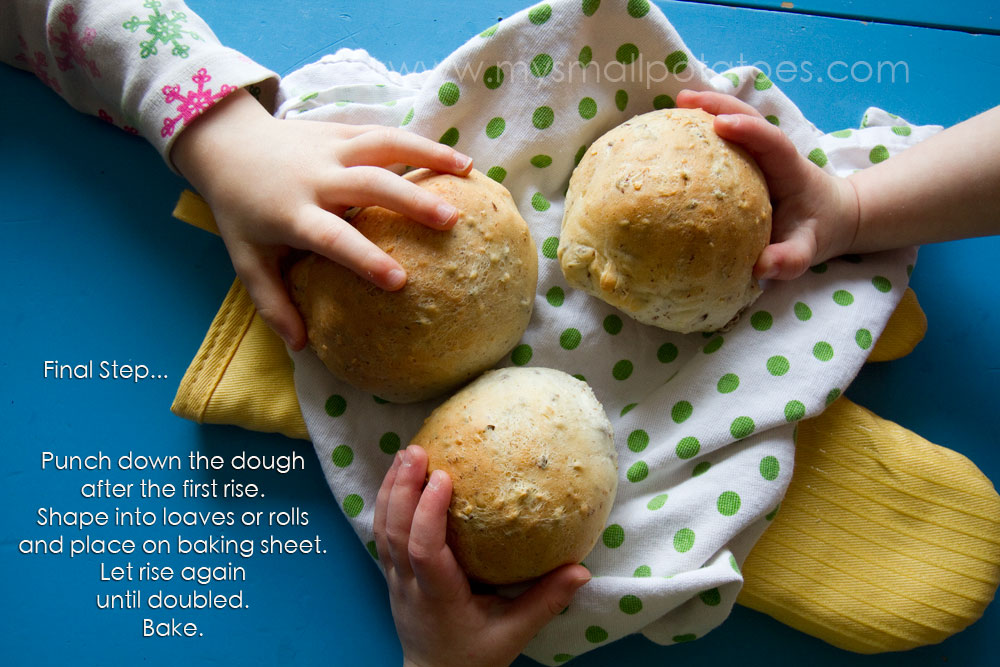 I do not typically use loaf pans for my bread. I shape them into round balls after the first rise, and place them on a baking sheet lined with parchment for the second rising, and then straight into the oven from there. If you use loaf pans, give them a little prep with non-stick spray so your loaves will slide out easily.
We prepared a plate of sandwich fillers once our bread was out of the oven, and the smalls were able to choose exactly what they wanted for their own lunch.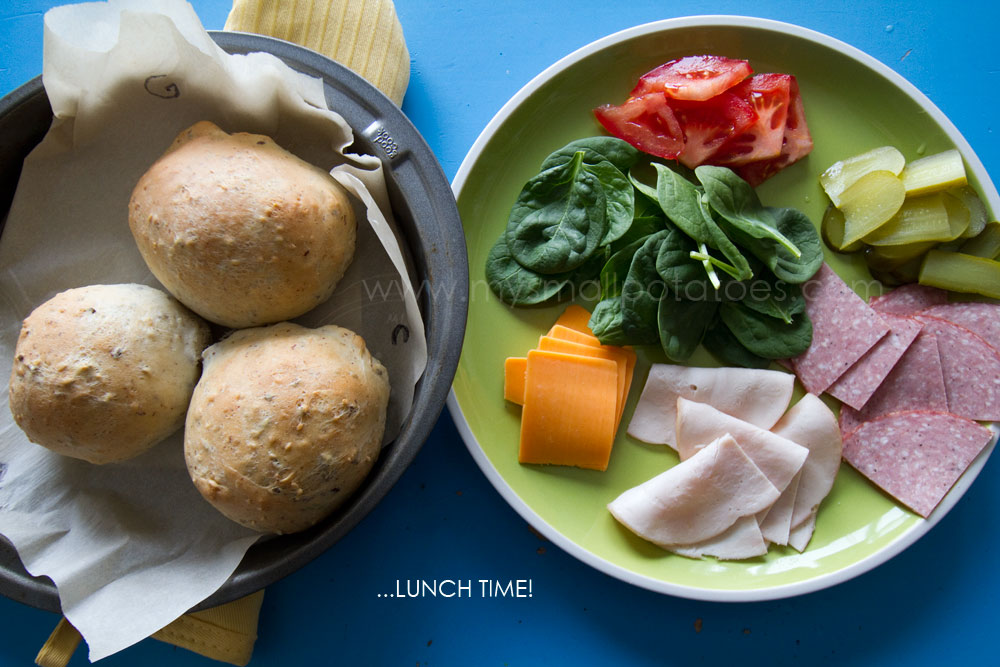 They had made their own meal, from start to finish with their own bare hands. And they were thrilled beyond measure. So very proud of their own little selves…
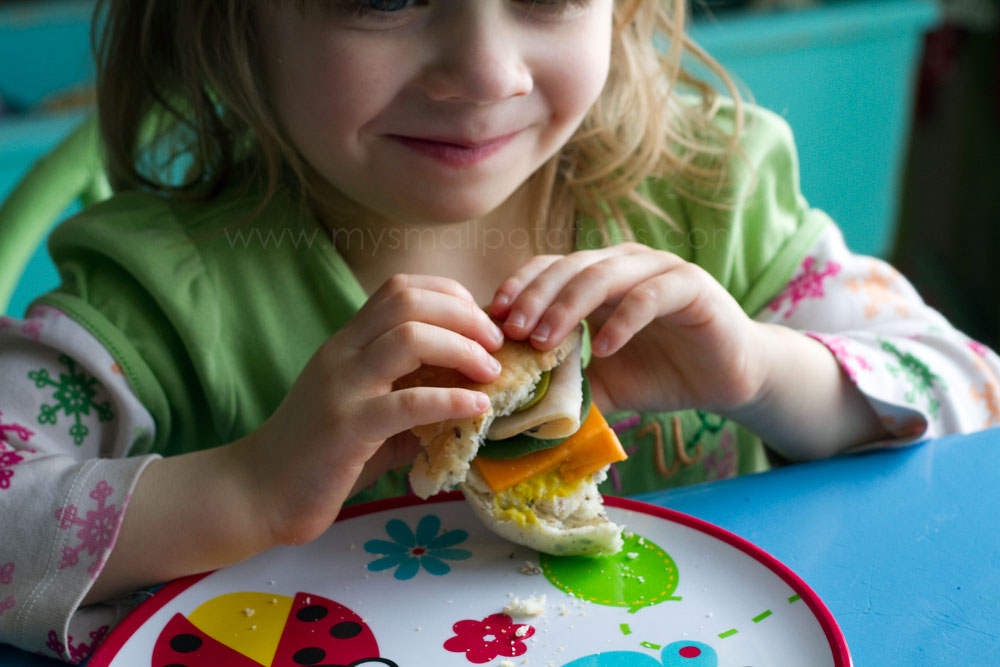 Not only were they engaged in an activity that explores the areas of science, sensory development, mathematics, nutrition, reading, small and gross motor skills… they ate every single bite of their lunch that day. Enough said.
Here is the bread recipe in full…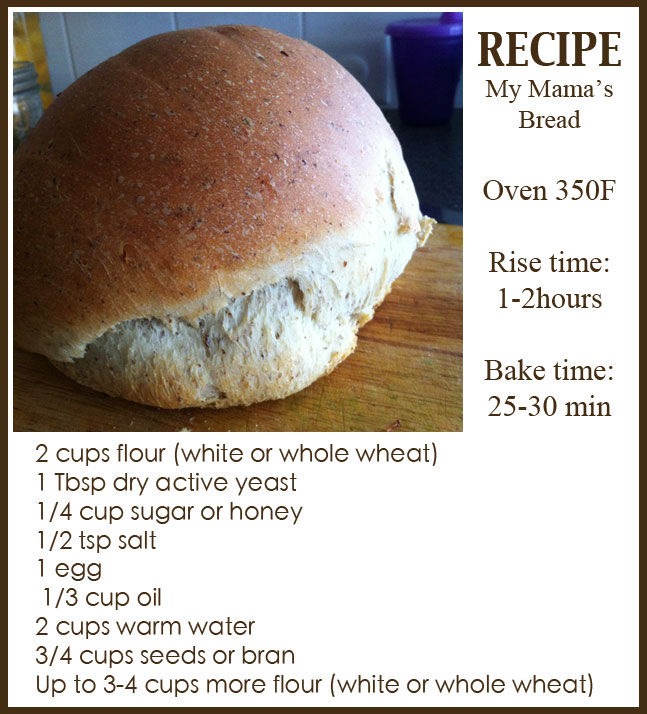
And here are those tips I promised you. They have been gathered from many friends from all corners of the earth to help me get my bread as yummy as my mama’s…
1. Use really warm, almost hot water in your mix.
2. Let the dough rise in a warm place, but not too warm. Too warm will cause the dough to rise really quickly and you may have a saggy bread issue once it’s baked and out of the oven awhile.
3. Do a “gluten test” on your dough after you knead and before the first rise. Take a small piece of dough and stretch it out thin, forming a nearly see-through window of dough. If the window tears easily, your dough is not ready and needs more kneading. If the window stays intact, you can go ahead and let your dough rise.
3. Bake your bread until it is golden brown and sounds hollow when you knock on it.
4. Let cool on or in the pan for about 5-10 minutes and then turn your bread out onto a cooling rack. Too much moisture will cause your bread to sag.
And there you have it. Now go make some bread and make my mama proud.
Thanks for stopping by,
Arlee, Small Potatoes

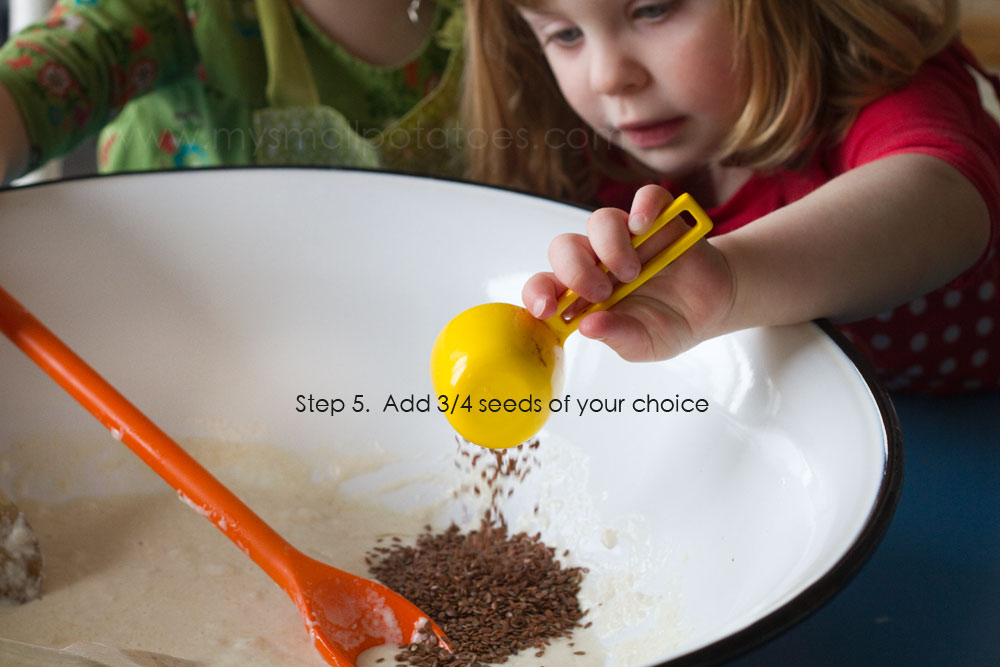
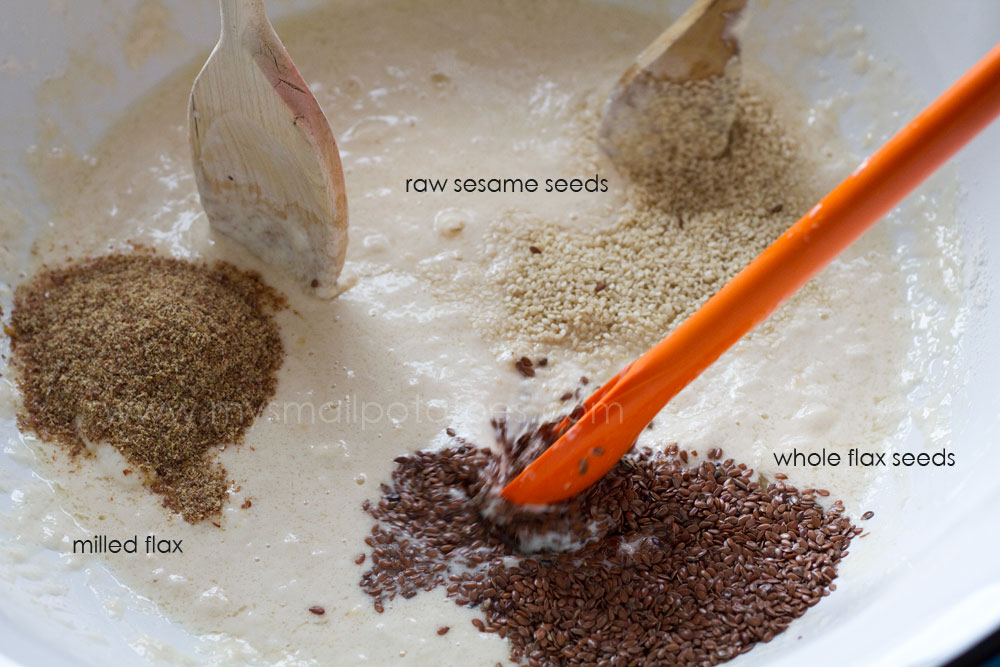
I sooo making this bread..I love all the seeds you put in yours…Ive never put an egg in my bread before… 🙂
Hey girl! It’s really yummy! And so easy. The seeds are a great edition, but you don’t have to always add them…the recipe will work without them. xo
I have used your mom’s recipe for years and I use a nine grain cereal for the grains….but just lately it was suggested to me to cook the cereal first before I added it to the dough….AMAZING! The bread is so moist and you don’t have hard crunchy seeds….Just saying….I love it this way….Love you too! Love reading your blogs!
Oooo…that sounds yummy! I am going to try that! Thanks, Auntie xo Love you! And thanks for reading!!! Woot!
Pingback: Teaching Young Children the Art of Preserving
Thanks Arlee! I’m going to try this!
Pingback: Toddler fun, baking bread & flat people :: Play Planner - NurtureStore
This is such a nice visual trip through baking bread! I will share! Thanks!
What a great recipe, the egg makes all the difference! Very inspiring that you do it with toddlers.
I would’ve never thought my toddler could actually bake bread!! This is awesome and the visuals make it even better. 🙂
I love homemade bread, and was given a bread maker for a wedding present, but gave it away because the bread just did not taste like homemade bread! There is something so wonderful about sharing this skill with our children! Beautiful photos too!
Thank you so much!!! And I agree about the bread machine! I have one in my pantry and it just sits there getting dusty!
This sounds amazing. I am going to make it today.
Instead of seeds I thought I might try sultanas and raisins. YUM. Thanks for posting this recipe.
Pingback: Good, Old-Fashioned Bread-Making…Baking Bread from Start to Finish with No Machines! | budgetparenting
thank you for your old time bread ricipe
Great recipe ~ we love your picture of the painted feet , my wife has always love our “little ones” feet I just showed her your recipe and site and we both needed no words between us but it sure made us smile because our little one is at school , we work from home and our home is just tooooooooo quiet
Cheers Ken & Arnaly
Aww…this just made my morning. Thank you so much!
Hey! Someone in my Facebook group shared this website with us so I came to check it out.
I’m definitely enjoying the information. I’m book-marking
and will be tweeting this to my followers!
Outstanding blog and great style and design.
Pingback: The Little Red Hen | Crozet Play School