Build a Mudpie Station…

“In the spring, at the end of the day, you should smell like dirt.”  ~Margaret Atwood

Winter is on it’s way out the door here, and good riddance! We’ve had quite enough snow and cold, thank you very much. It’s time to pull out the wellies and raincoats and get down to the business of getting dirty!

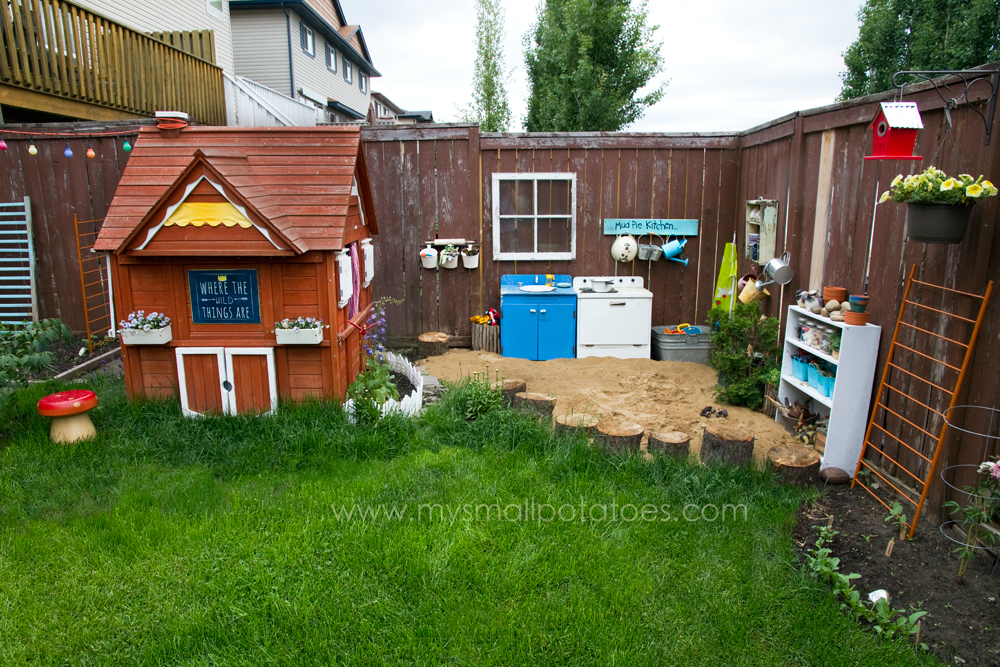
We already have a sandbox outside, but it’s just that. A sandbox. It serves it’s purpose all the day long, don’t get me wrong. But we needed more. A little something to celebrate the coming of Spring. And so, we transformed one little corner of our patio into a true-blue mudpie-making station. It didn’t cost one tiny little cent. And it shouldn’t cost you anything either…unless you need to buy the dirt.

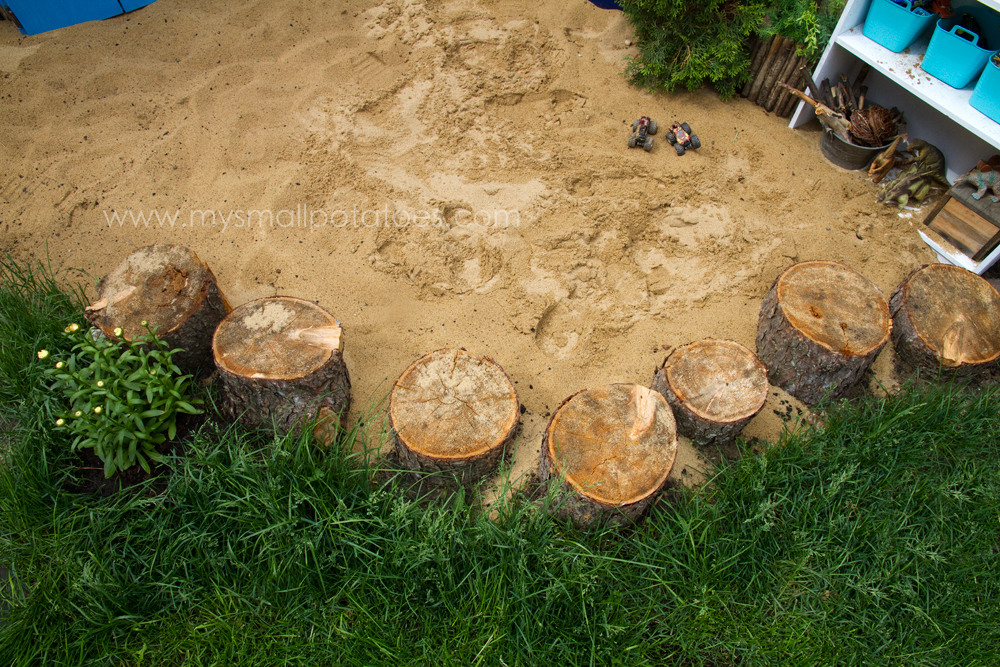
Every mudpie station needs dirt. You can use sand, if you like. I emptied a few terra cotta pots filled with potting soil I had grown herbs in last summer, into a big metal tub that I have had for years.  I placed it right under the table so the kids could easily scoop and dump in and out of their bowls without having to haul it across the patio. This also helped to contain the muddy mess to one area. If you don’t have a big ol’ tub like this one, a plastic storage bin would work just as well.

The table I used was one that we outgrew in the day home, as our numbers were rising. I had stored it out in the garage, because I have a bad habit of never throwing things out. It was in rough shape, with paint and scuffs on it, but that is the perfect kind of tables for mudpies. Perfect tables make mums worry about them getting dirty, scratched, or weathered.

I decided our station needed a sign, so I grabbed an old board, my 7 yr old daughter painted it, I wrote the words on it, and my 5yr old son lent me his painty hands! It was done in less than 20 minutes!

Next I drilled some wood screws into the fence boards and hung my old enamel-painted tin bowls up. I have collected a few over the years from garage sales and little shops. If you don’t have any of these, don’t worry…plastic buckets will do just as well.  Just use extra long screws or hooks, and hang them from their handles. Make sure you hang them at heights that the children can reach without assistance.

I used an old wooden drawer to make an excellent spice rack! I just screwed it right to the fence and filled it with old spice jars, coffee tins, and such.

See? Very simple.And very effective.

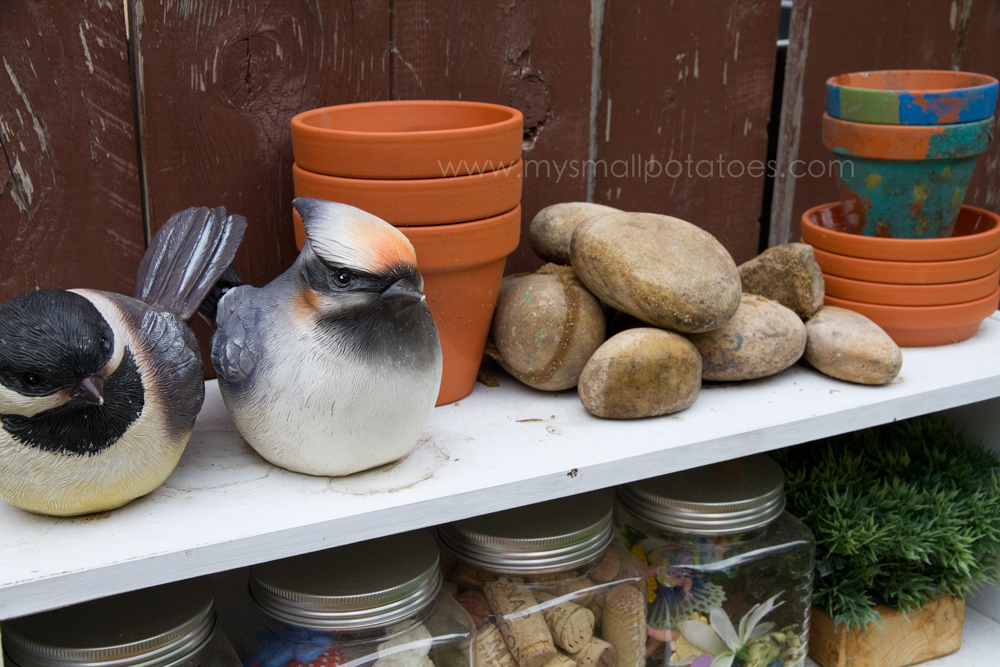
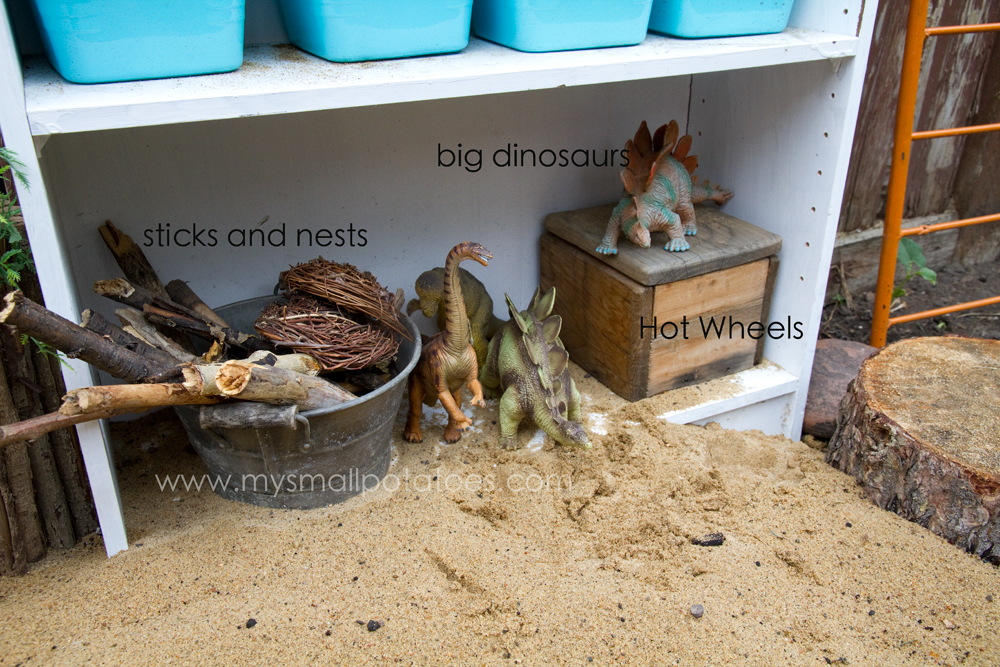
Now you can start filling every little tin or empty can you can find with odds and ends for mixing and decorating their mudpies. We used twigs, pinecones, pebbles, and coloured sand. Don’t forget to include wooden or metal spoons for stirring, and a jug for pouring water.You can’t have mud without water!  Also, make sure you have a storage place for muffin tins, cake pans, and pie plates. I had a few ratty ones that were in my cupboard. They were a bit rusted and in need of replacing, so I put them outside in box for the kids to use. I also hung plastic aprons on screws, and stuffed a bunch of garden gloves in a can, for those kids who are a bit fussier about getting dirty.

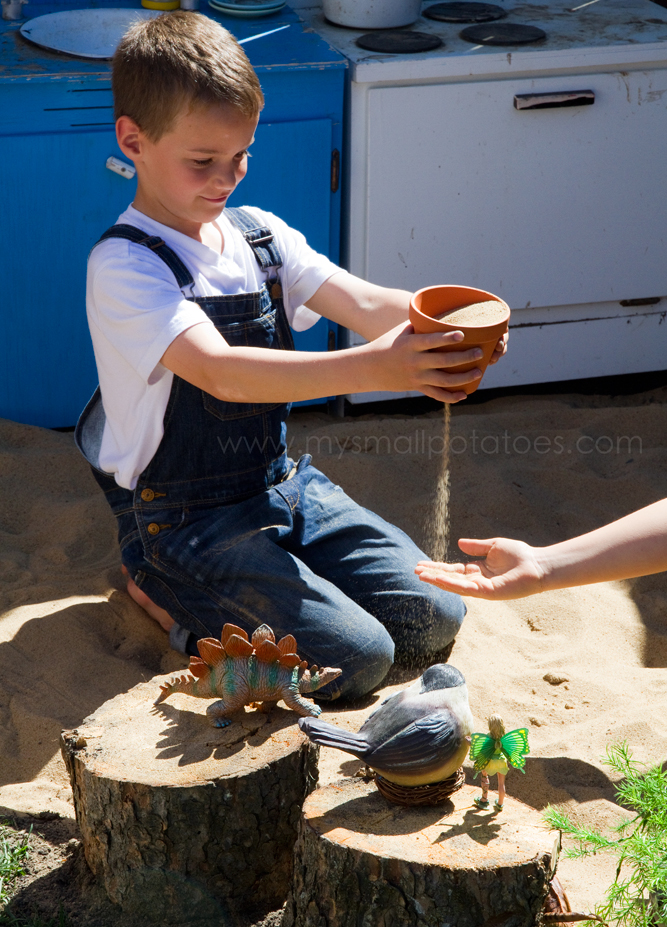
I also supplied the children with shovels for digging dirt out of the metal tub, and foil pie plates, as I did not want to sacrifice any of my kitchen ones.

Now that we’ve got all the basics covered, the rest is just fun!! Get playing!

But don’t forget to add a wash bin! You will be happy you did! I just used my ice tub and hung a towel on the handle. I fill it with warm water before every “baking session.” Simple.

So there you have it! A fun, inexpensive project to usher in the spring season. I hope this brings you and the children in your life, plenty of hours spent playing in the dirt!

Enjoy!

Thanks for stopping by!

It’s Not JUST a Sandbox…Turn Your Sand Play Area into Something Special

title
“The creation of something new is not accomplished by the intellect but by the play instinct.”  ~Carl Jung

If you give a child a sandbox, he will play in it.

If you give a child a sandbox equipped with ALL kinds of materials for play possibilities, he will create worlds the likes of which we’ve never even imagined. Except maybe, when we were children ourselves.

With creative materials and various “loose parts” at his fingertips, the potential to turn a child’s simple play session into an extended, imagination-filled play experience grows exponentially. He will become an architect, a builder of new worlds. She will become a scientist, experimenting with cause and effect and gravity, making predictions and testing hypothesis.  He will be an accomplished chef, serving his imaginary patrons only the best recipes…all of his own creation.

And also? Your child will be busy and happy longer.

Children will play. It’s what they do. It’s our job as teachers, parents, caregivers, and grandparents to create an environment conducive to play. Now, I’m not talking about buying all the toys. I am well aware that children play best with a cardboard box and a couple of sticks. What I’m talking about is providing simple materials to enrich their play spaces; making spaces child-friendly, where messes can be made, ideas can be tried, and children can do their best work.

Adults work so much better with their offices and workspaces built to encourage efficiency and comfort. Why should a child’s work space be any different? Play is a child’s work. So let’s give them the space they need to succeed in the work place!

Quite often, we focus only on the indoor workspace. But even without reading studies and statistics, I can tell you from experience, that children thrive in the outdoors. The kids I work with on a daily basis NEED to be outside at LEAST once a day or tempers flare, they get antsy, or they simply get bored.

This Spring, I’ve been working on making our outdoor play/work space something really special. We started with our Clubhouse, and now we are sharing our new and improved sand play area.thewholepicture
The Mud Pie Kitchen tucked in the back there, will be a different post altogether. Today we will go over the sand play area, starting with the overall design.

I used stumps to divide the sand from the grass for a few reasons. First, it looks fantastic! Secondly, it was cost-effective, having had the stumps donated by one of our dayhome families. But most importantly, the stumps create a terrain that begs for children to come and play.

Stumps serve SO many purposes when it comes to a child’s work space. Stumps make great little tables. Stumps create walls and shade for little creatures that might be part of the day’s play session. Stumps are great for walking on, balancing, and hopping from one to the next. Stumps are helicopter landing pads, tall mountains, diving boards, and skating rinks. Stumps are all the things.
variedterrain
I simply dug holes in the ground, inserted the stumps, stomped and jumped up and down on each one until they all stood sturdy and firm, then packed the dirt back in and around them. I placed them at various heights to create more of a challenge when walking from one to the next.

I used 13 bags of play sand from Home Depot to fill this space. I use a tarp and stones to weigh it down if I need to cover it for any reason. We have had NO cats in our yard thus far, so they have not been a problem at all.

I left a space between the stumps to create a pathway to the clubhouse door, thus preventing any kids tripping on their way to and from the clubhouse. You’ll see at the back of this photo I have created a little storage unit for diggers. This is no ordinary storage. It is a log tunnel for bunnies and guinea pigs I purchased at the pet store.  I have turned it on its side and placed up against the fence to store the plastic trucks. When it’s not holding the diggers, it can be used as a tunnel for cars, trucks, and diggers, or caves for dinosaurs, bears, etc. I believe in getting the most bang for my buck, so I always try to think of more than one purpose for things I add to our play space.
pathway
I also keep the grass tall around the stumps, it provides a wilder, more natural terrain, and creates great cover and hiding places for little toys and parts used in free play.

Our sand play materials can be found on our “loose parts” shelf right next to the sand.  A child’s play materials should be  convenient, visible, and easily accessible. No artist will want to traipse across the studio each time he needs a pencil or a particular paintbrush, it interrupts the flow of creativity and productivity. I purchased the shelf at a thrift store for $5 and painted it with an exterior paint from the mis-tinted paints section of the local hardware store.

All of the materials on our loose parts shelf with the exception of the terra-cotta pots and the ornamental birds, were found in our indoor stash of play materials. I simply moved them outside.

The top shelf contains little terra-cotta pots, pot trays, river rocks, and little ornamental garden birds. These birds are a favourite for flying the flower fairies around the back yard. They were purchased at Wal-Mart in the seasonal section for $6/each.
birds_pots_rocks
*And if you have terra-cotta pots, you have no need to store funnels in your play space. Children have a way of showing us that “other purpose”for things we put within their reach.potfunnel

The second shelf contains little plastic jars of loose parts, along with plastic grass bits from the dollar store and a few wood blocks…
plasticjars

The middle shelf contains bins of larger items, too big for jars and too fussy for lids…bluebins

At the bottom, we have sticks, bird nests, metal basins, a box of Hotwheels, and the larger dinosaurs…bottomshelf
*Next to this shelf is another wooden tunnel I use to store plastic greenery. The children most often use the greenery as trees in their playscapes, but I’ve seen them used as cotton candy, so the sky really is the limit when it comes to play materials!

All in all, this project has been worth every single second of work done and every penny spent. It is a hub of activity whenEVER we are in the back yard…

playing

instagram
Thanks for stopping by!

~Arlee, Small Potatoes

pinImage

The Great Pumpkin Carving Party!

“Each year, the Great Pumpkin rises out of the pumpkin patch that he thinks is the most sincere. He’s gotta pick this one. He’s got to. I don’t see how a pumpkin patch can be more sincere than this one. You can look around and there’s no sign of hypocrisy. Nothing but sincerity as far as the eye can see.”   ~Linus, It’s The Great Pumpkin, Charlie Brown

Last week, I was catching up on my kellehampton.com posts that I’ve missed and I came across this one…Easy Pumpkin Carving Party. I have to say it right now. I was super envious. We are sitting under a foot of snow and it’s freezing cold outside and there was NO WAY we could ever have a magical woodsy autumn pumpkin carving party.

Or was there?

When I finished moping and fussing, I got to thinking. We could do it INSIDE! Take that, snowy Canadian autumn!

It was probably the most inexpensive party I have ever done. My friend had diligently raked her yard before the snow fell and she still had the bags of leaves! I snagged a bag from her, gathered up the pine cones from our Mud Pie Station, and snooped around in the pantry for some goodies.

Here is what I came up with…Popcorn, peanuts, pumpkin snickerdoodles, and sparkling apple juice. Easy.  I used some of the leaves and some ornamental pumpkins, pears, pinecones, and apples as decorations.I tied kitchen strung around the stemware for a little homespun bling…I set out drop cloths on the kitchen floor and then poured the rest of the leaves around to give it an outdoor, woodsy feel…it smelled SO good in my house, let me tell you!I made sure we had spoons for digging out pumpkin pulp…And pencils and paper to plan and draw our pumpkin faces…The ladybugs started to crawl out from under the leaves and we were all excited to have them as party guests…I cut the lids off the pumpkins for the kids and they got started…Make sure you have a bucket or trashcan to put all the slimy pulp in so it doesn’t get all over your “picnic blankets”!Of course, it wasn’t long before his big sister started flinging pumpkin slime at him.  Maybe keep some wash cloths close by, in case of shenanigans! 

My kids loved sitting in the warm kitchen with the smell of autumn in the air as they watched the icy, snowy contrast outside the patio windows. They sipped their cider from real glasses, played with lady bugs, tossed the leaves around, and created their pumpkin lanterns.They even “carved” their apples!Here’s a look at what our pumpkins looked like when we finished…We loved our autumn kitchen so much, we left it overnight. The kids came down in the morning and played in the leaves with their Hotwheels and stuffed animals.

I wanted the smalls to enjoy some of our autumn kitchen fun when they arrived today, so I made them a special Autumn FairyLand in our sensory table…They are piling up the leaves and hiding the fairies as I write this.

We may not have been able to go out in the woods to carve our pumpkins, but we still had a very memorable saturday afternoon. Right here in our cozy kitchen.Happy Autumn, everyone!

Thanks for stopping by!

~Arlee, Small Potatoes

A Race Car Birthday Party on a K-Car Budget…

“Anyone can do anything with a million dollars. Look at Disney. But it takes more than money to make something out of nothing, and look at the fun I have doing it.”  ~Tressa Prisby

I have a whole lot of kids. This means I host a whole lot of birthday parties. Problem is, I don’t always have a whole lot of money!  However, this does not mean my kids don’t have really cool birthday parties! I have become and expert at throwing a party for under $100, let me tell you! And it’s not hard, really. You just need to think a little more and buy a lot less.

The first thing I ask my kids is, “what kind of party do you want?” Then I start by looking around the house to see what we already have that we could use. Usually, I will find plenty. The thing is, the type of party a child asks for is most likely something he is already interested in, which means you probably already have a bunch of stuff in your home you can use.

My smallest boy turned 6 last week, and he wanted a “race car” birthday party. Yes, I could have gone to the party store and found a hundred different plates and hats and party favours that had a car theme. But how much of that stuff is disposable? All of it. We spend all kinds of money on things that will end up in the trash can at the end of the day.

Here is a list of things I typically buy for a party, with the estimated cost of each item…

Colored serviettes: $2. Normally we use cloth ones in my house, but I make the exception at birthday parties, because I just don’t want extra laundry!

Paper cake plates: $2 I do not buy paper plates for the meal if I am serving one. I use our own dishes and throw them in the dishwasher after the party. I do buy cake plates, though. I find most kids don’t eat all their cake, so it’s nice to be able to just throw the whole kit and kaboodle in the garbage instead of scraping and rinsing plates.

Balloons: A bag of 12: $2 If I am putting helium in them, I have them done at the dollar store for 75cents each. There is no need to go to an expensive florist for balloons. At this particular party, I didn’t use helium. I put matchbox cars inside the balloons before blowing them up, so the kids could pop them later and take them home as party favours. I bought 1 package of 10 no-name matchbox cars in the birthday section of the grocery store for $4.The children tried many different ways to pop their balloons, from sitting on them… To squashing them with big trucks…When the baolloons popped, it was always the same reaction…

Cake: $18 Yes, I buy a store bought cake, because quite frankly, I don’t have a whole lot of extra time to bake one! I take the store bought cake and I customize it to the party theme.I let my son choose the cars for his cake form his own collection. His favourite car was the first to make it’s way to the kitchen…I used the white chocolate wafers as car ramps to hold the front of the cars up, giving it more dimension and character…And I even backed the truck up into the side of the cake. My son thought that was “epic!”I used candles we have used before (I wash them and put them away after the cake is all finished)…

Party hats:  $3 I like to buy plain hats and do them up with my own personal flair. I don’t always buy party hats, but this time I had an idea. I took some of the cars from the package I bought for the balloons and used glue dots from my scrapbooking supplies to stick the cars to the hats…The kids could take their hats home and in the end, were left with a new car to play with. Plus, it looked really cool according to my boy!

Candy and treats: $20 We have a traditional candy bowl at our parties. The birthday boy/girl gets to shop for 4-5 packages of their favourite candy and dump it all into a big bowl for everyone to share. What I like about this is that I don’t have to fill loot bags with candy…the children get their fill at the party! 

Favourite Meal: This depends on what you’re making. For this particular party, the cost of the meal was about $13. Gage’s favourite meal is pancakes and bacon. I purchased whipping cream, strawberries, and bacon. The rest, I already had in my pantry.

The money we’ve spent so far is only $64! You have a whole $36 left to spend before you reach $100! You could bank it, or you could buy actual name brand cars! Hehehehe!

To finish off a party, I usually do a craft or activity for the kids. This time, the activity was messy. But very inexpensive…I started out by pouring left-over brown paint from the dayhome into the sensory table. You could use a big  plastic bin or two, depending on how many children you are planning for. The kids “needed” more mud, so I whipped up a recipe of cornstarch paint. Because my table is so large,I multiplied the recipe so I was using almost 2 cups of cornstarch. You could probable triple or quadruple it and have enough for a mid-size plastic bin…Gage chose the cars he wanted to use for the mud derby, and away they went…                        This looks like a fantastic mess…but its very simple to clean up. Cornstarch dissolves in water, so it all washes down the sink. I scooped up what I could into a bucket. Then I brought the bin into the sink and used the spray nozzle to wash the rest down the drain. Easy. And what fun! He said it was his favourite part of his birthday party.

After the derby, we washed up and blew out the candles. A successful party for under $100. We did it! 

And then he said those magic words…

“Mama, I love this day.”

Thanks for stopping by!

~Arlee, Small Potatoes

The Great Dinosaur Stomp…

“Dinosaurs maybe extinct from the face of the planet, but they are alive and well in our imaginations.”  ~Steve Miller

The sun was out, the babies were sleeping and the boys were bored. In case you weren’t aware, these are the perfect conditions for dinosaurs. Oh, and mud.

It all started rather innocently, really…

A roll of paper, some tape, a few dinosaurs and a small tub of mud.

After their mud bath, it was time for a little stroll on the paper…

But there must have been something in that mud…

The dinosaurs became very hostile. And loud.

And then it all went sideways. The boys themselves became dinosaurs, and my patio was no longer a safe place for photographers! I had to move inside and make photographs from the safety of my kitchen!

The clothes came off.

“Because”, he said, “Dinosaurs don’t wear clothes, Mama.”

I did manage to convince the creature to wear swim trunks, however!

While this dinosaur stomped on, and on, and on, the other one changed back into a boy and took on the task of washing the toys…

The remaining wild thing was tamed at last with his own private “hot tub” on the patio…

Now, what am I going to feed these hungry dinosaurs??

Thanks for stopping by!

~Arlee, Small Potatoes.

The Smallest Things…

This long, cold and seemingly never ending winter has certainly taken it’s toll on my soul. Everything seemed dull, grey, brown, and dirty. I felt caged in. And with all my little charges underfoot, it seemed even worse. My little house started to close in on me and I was tripping on stuff and children ALL the time. I found myself bursting into tears with an intense ache in my soul that I couldn’t give a name to. I was simply miserable. Not everyday…but a lot of them. 


And did I ever complain? Oh ya. You bet I did. Laundry piled up. Dishes were left in the sink. Beds didn’t get made. Bathrooms were awful…you get the picture. 

And then the sun came out. And I am not talking about the big ball of fire in the sky.(Although, that DID come out too!) I looked at my wall. The same wall I walk past every day. The same wall I see as I come down to the kitchen every day. But this time, I actually saw it. And the sun came out…from somewhere inside. Slowly at first, it was out just the same. What was so special about this wall?? Well, I will show you…

You see? I had spring and sunshine right here in my house! I didn’t need to look any further. These small things were there to brighten my day all along. And I had my eyes closed. And so, as the sunshine spread through my muddled soul, I began to bring in a little more colour in other corners of my home. I decided to make my kitchen the first corner.

So I went to my happy place…HomeSense! Lol! And i bought this pretty bowl, along with a few others in assorted sizes. And well, wouldn’t you know, there was an antique show this weekend in my city! When you look for sunshine…you will find it. 

See??

It makes me giddy just looking at it. It really does. I am in love. This table is from the 1920’s and it was found in an old barn up in Barhead. And she’s all mine. And the chairs were waiting at that antique show JUST for me…waiting to  soothe a worn-out Mumma of 6.

When my kids came home from their dad’s tonight, they ran right in, “dibbs-ed” a chair colour, grabbed a pot of crayons, and sat down to create some more “small things.”


And so we have come full-circle…

The smallest things DO take up the most room in my heart. I just need to remember to shove the rest of that crap out of the way. The doubt. The fear. The impatience. The sadness. The crankiness. There is no reason for all of THAT to take over…not when there is so much colour everywhere! So let the sunshine in!!